Changing the battery on the wireless sensor
Follow the steps below to change the battery on a Wireless Temperature Sensor (CRFSW).
Replace the battery
-
Open the sensor by placing a small flathead screwdriver in the slot located at the top of the sensor, behind the fascia, and twisting the screwdriver.
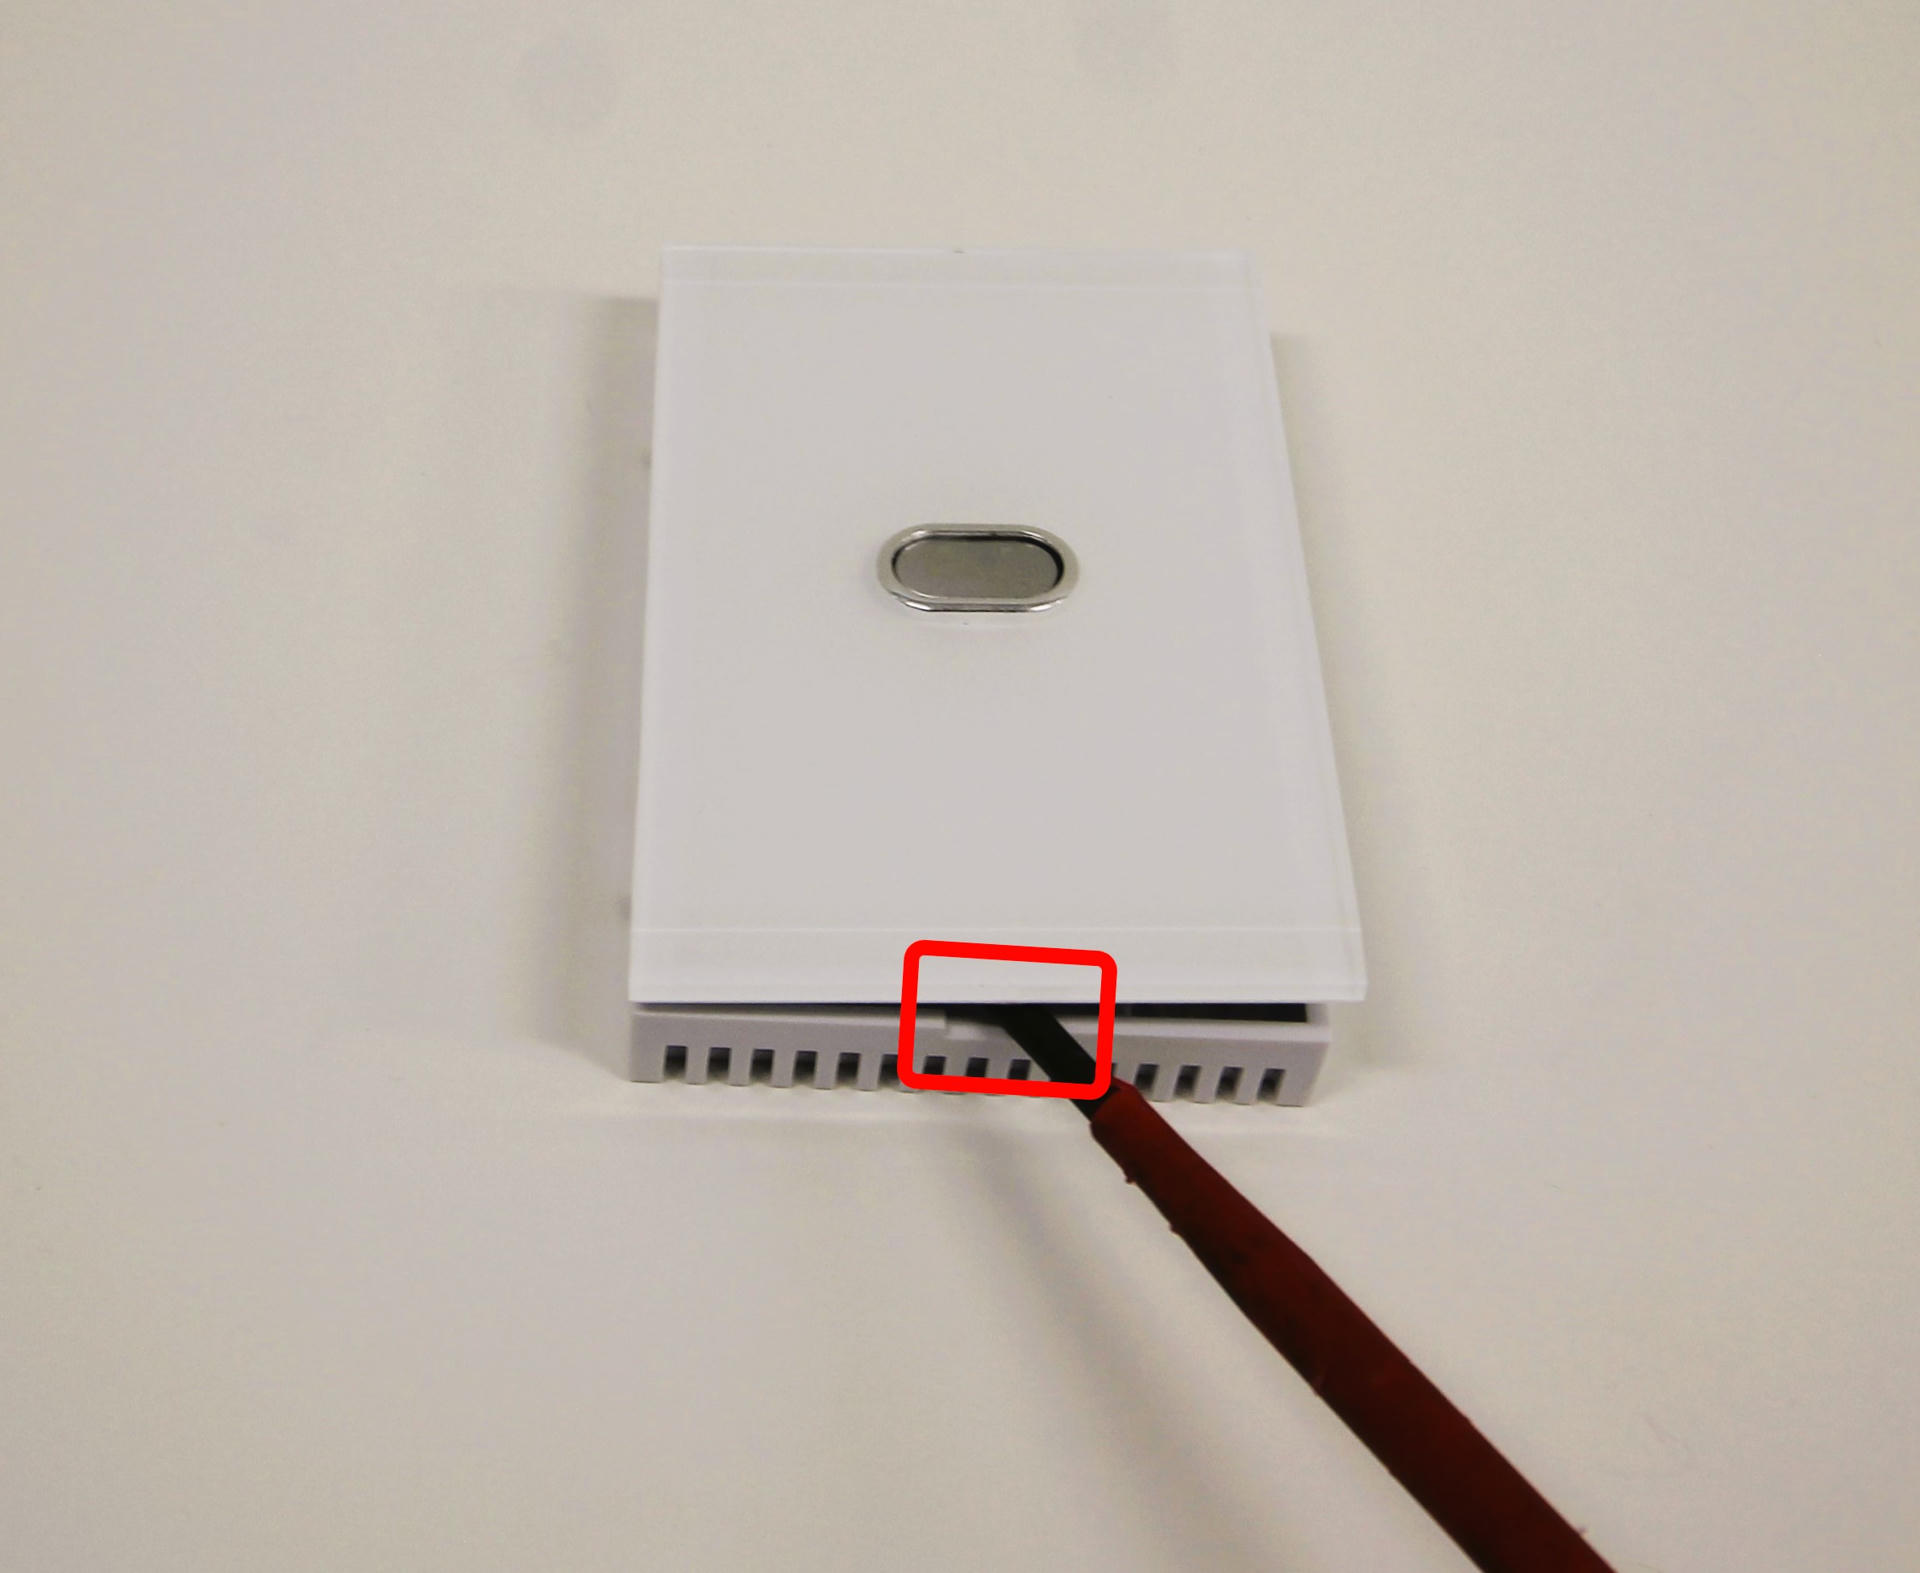
-
You will be able to see the CR2032 battery inside the battery holder.
New type:
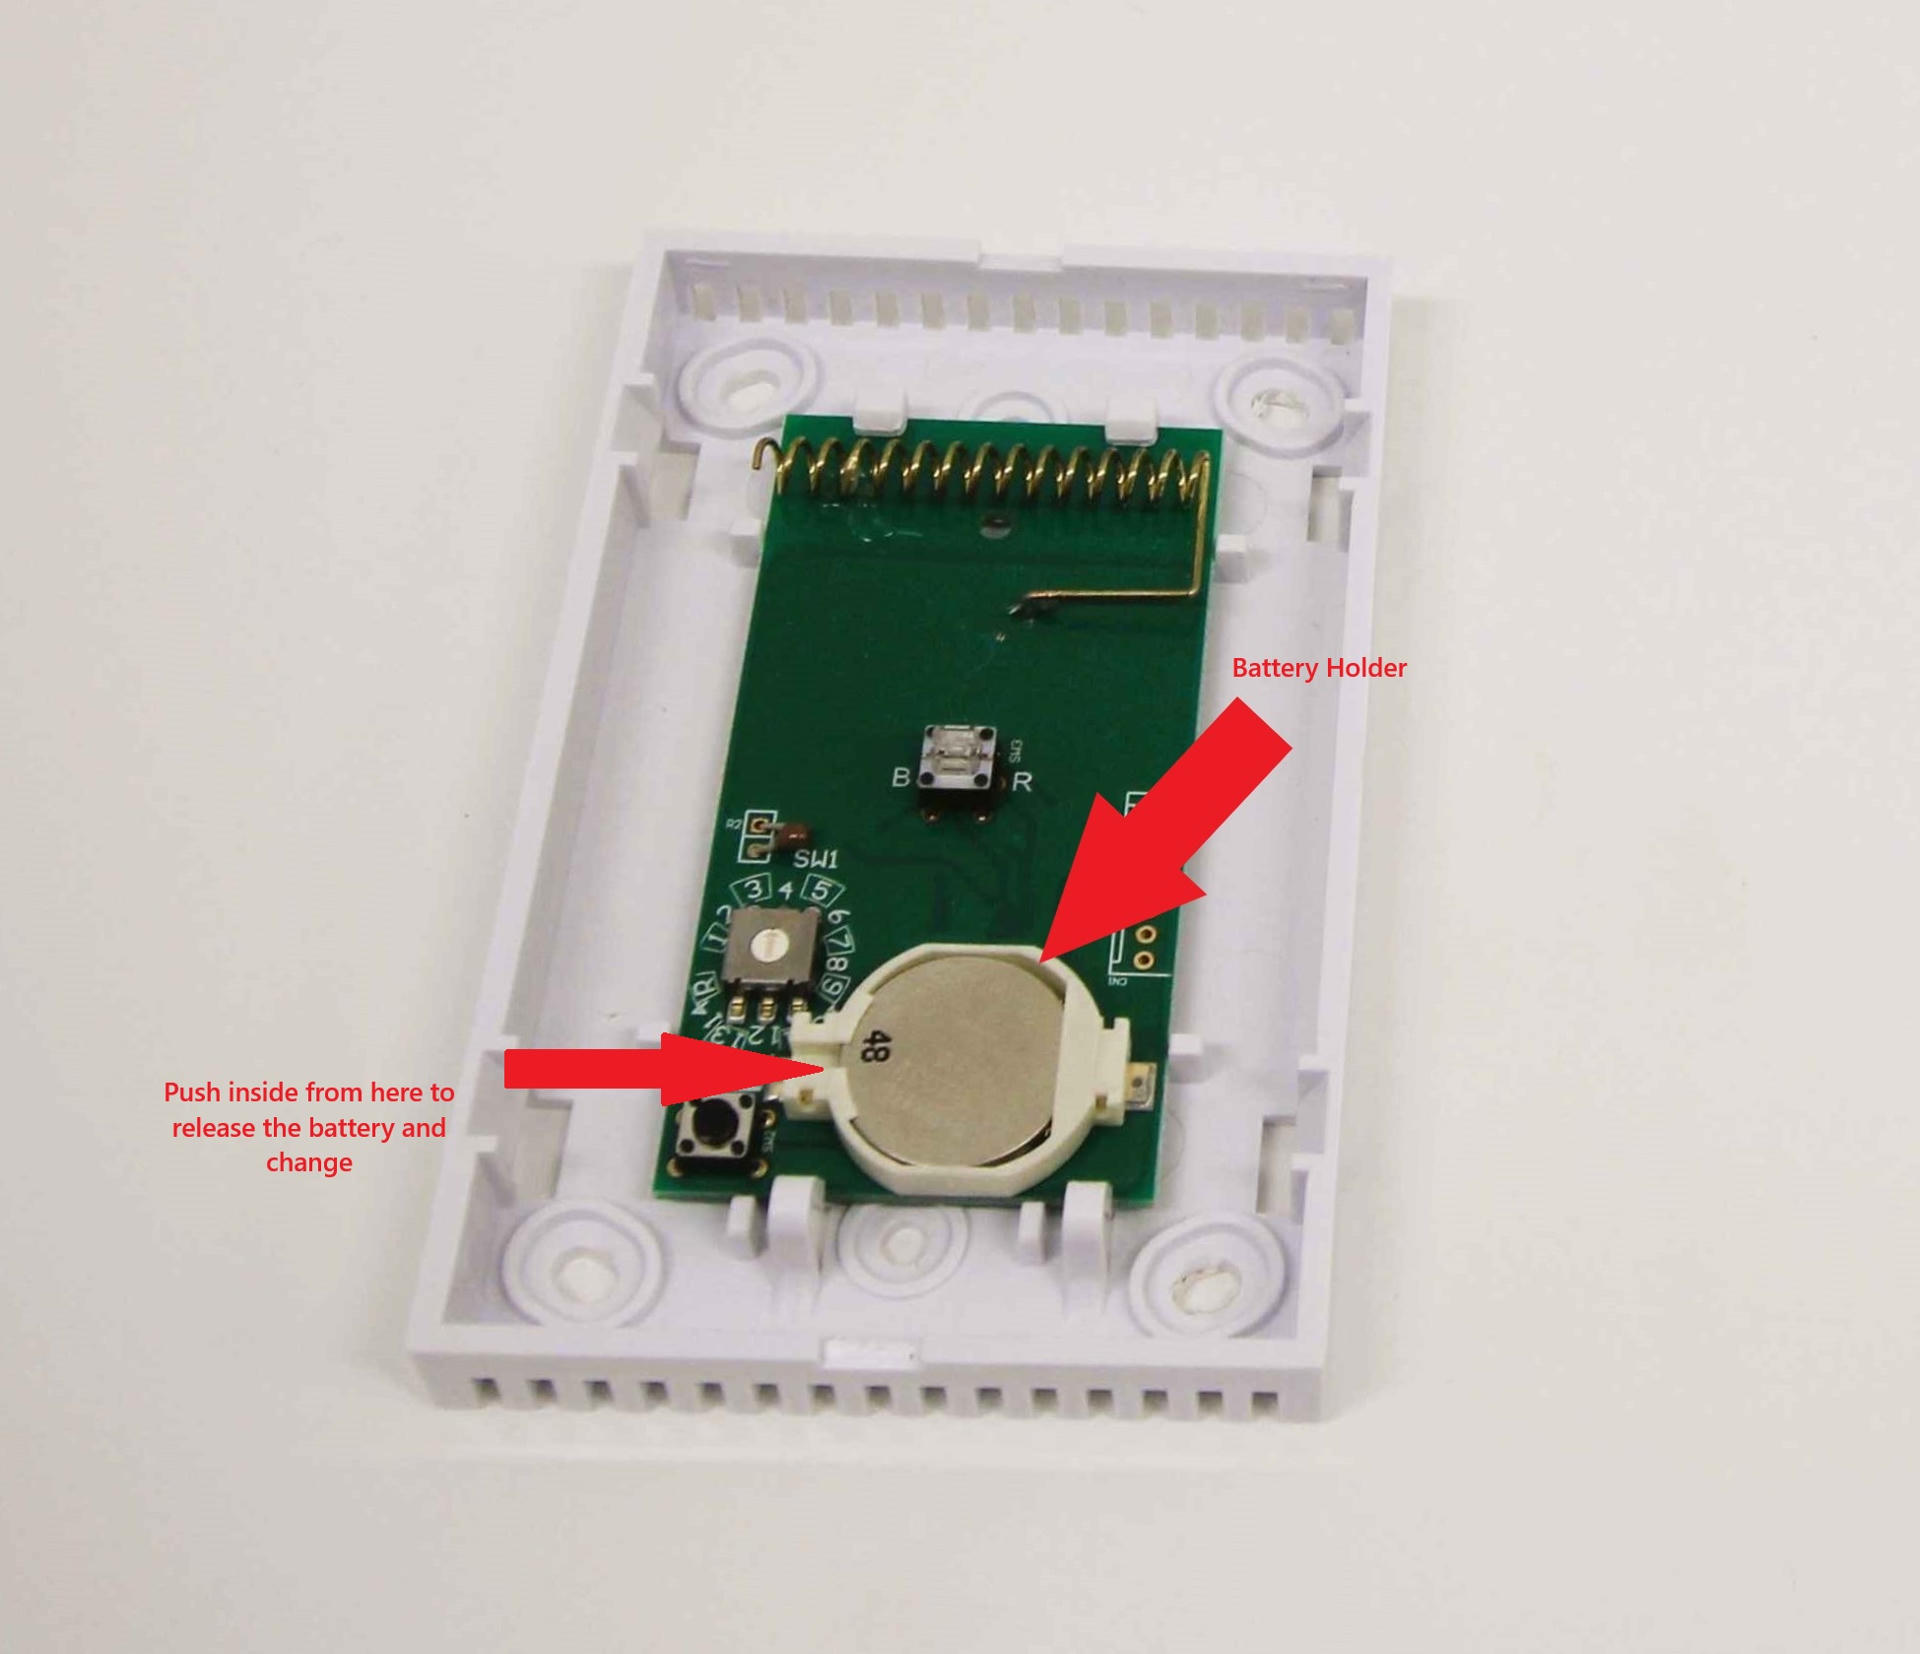
Old type:
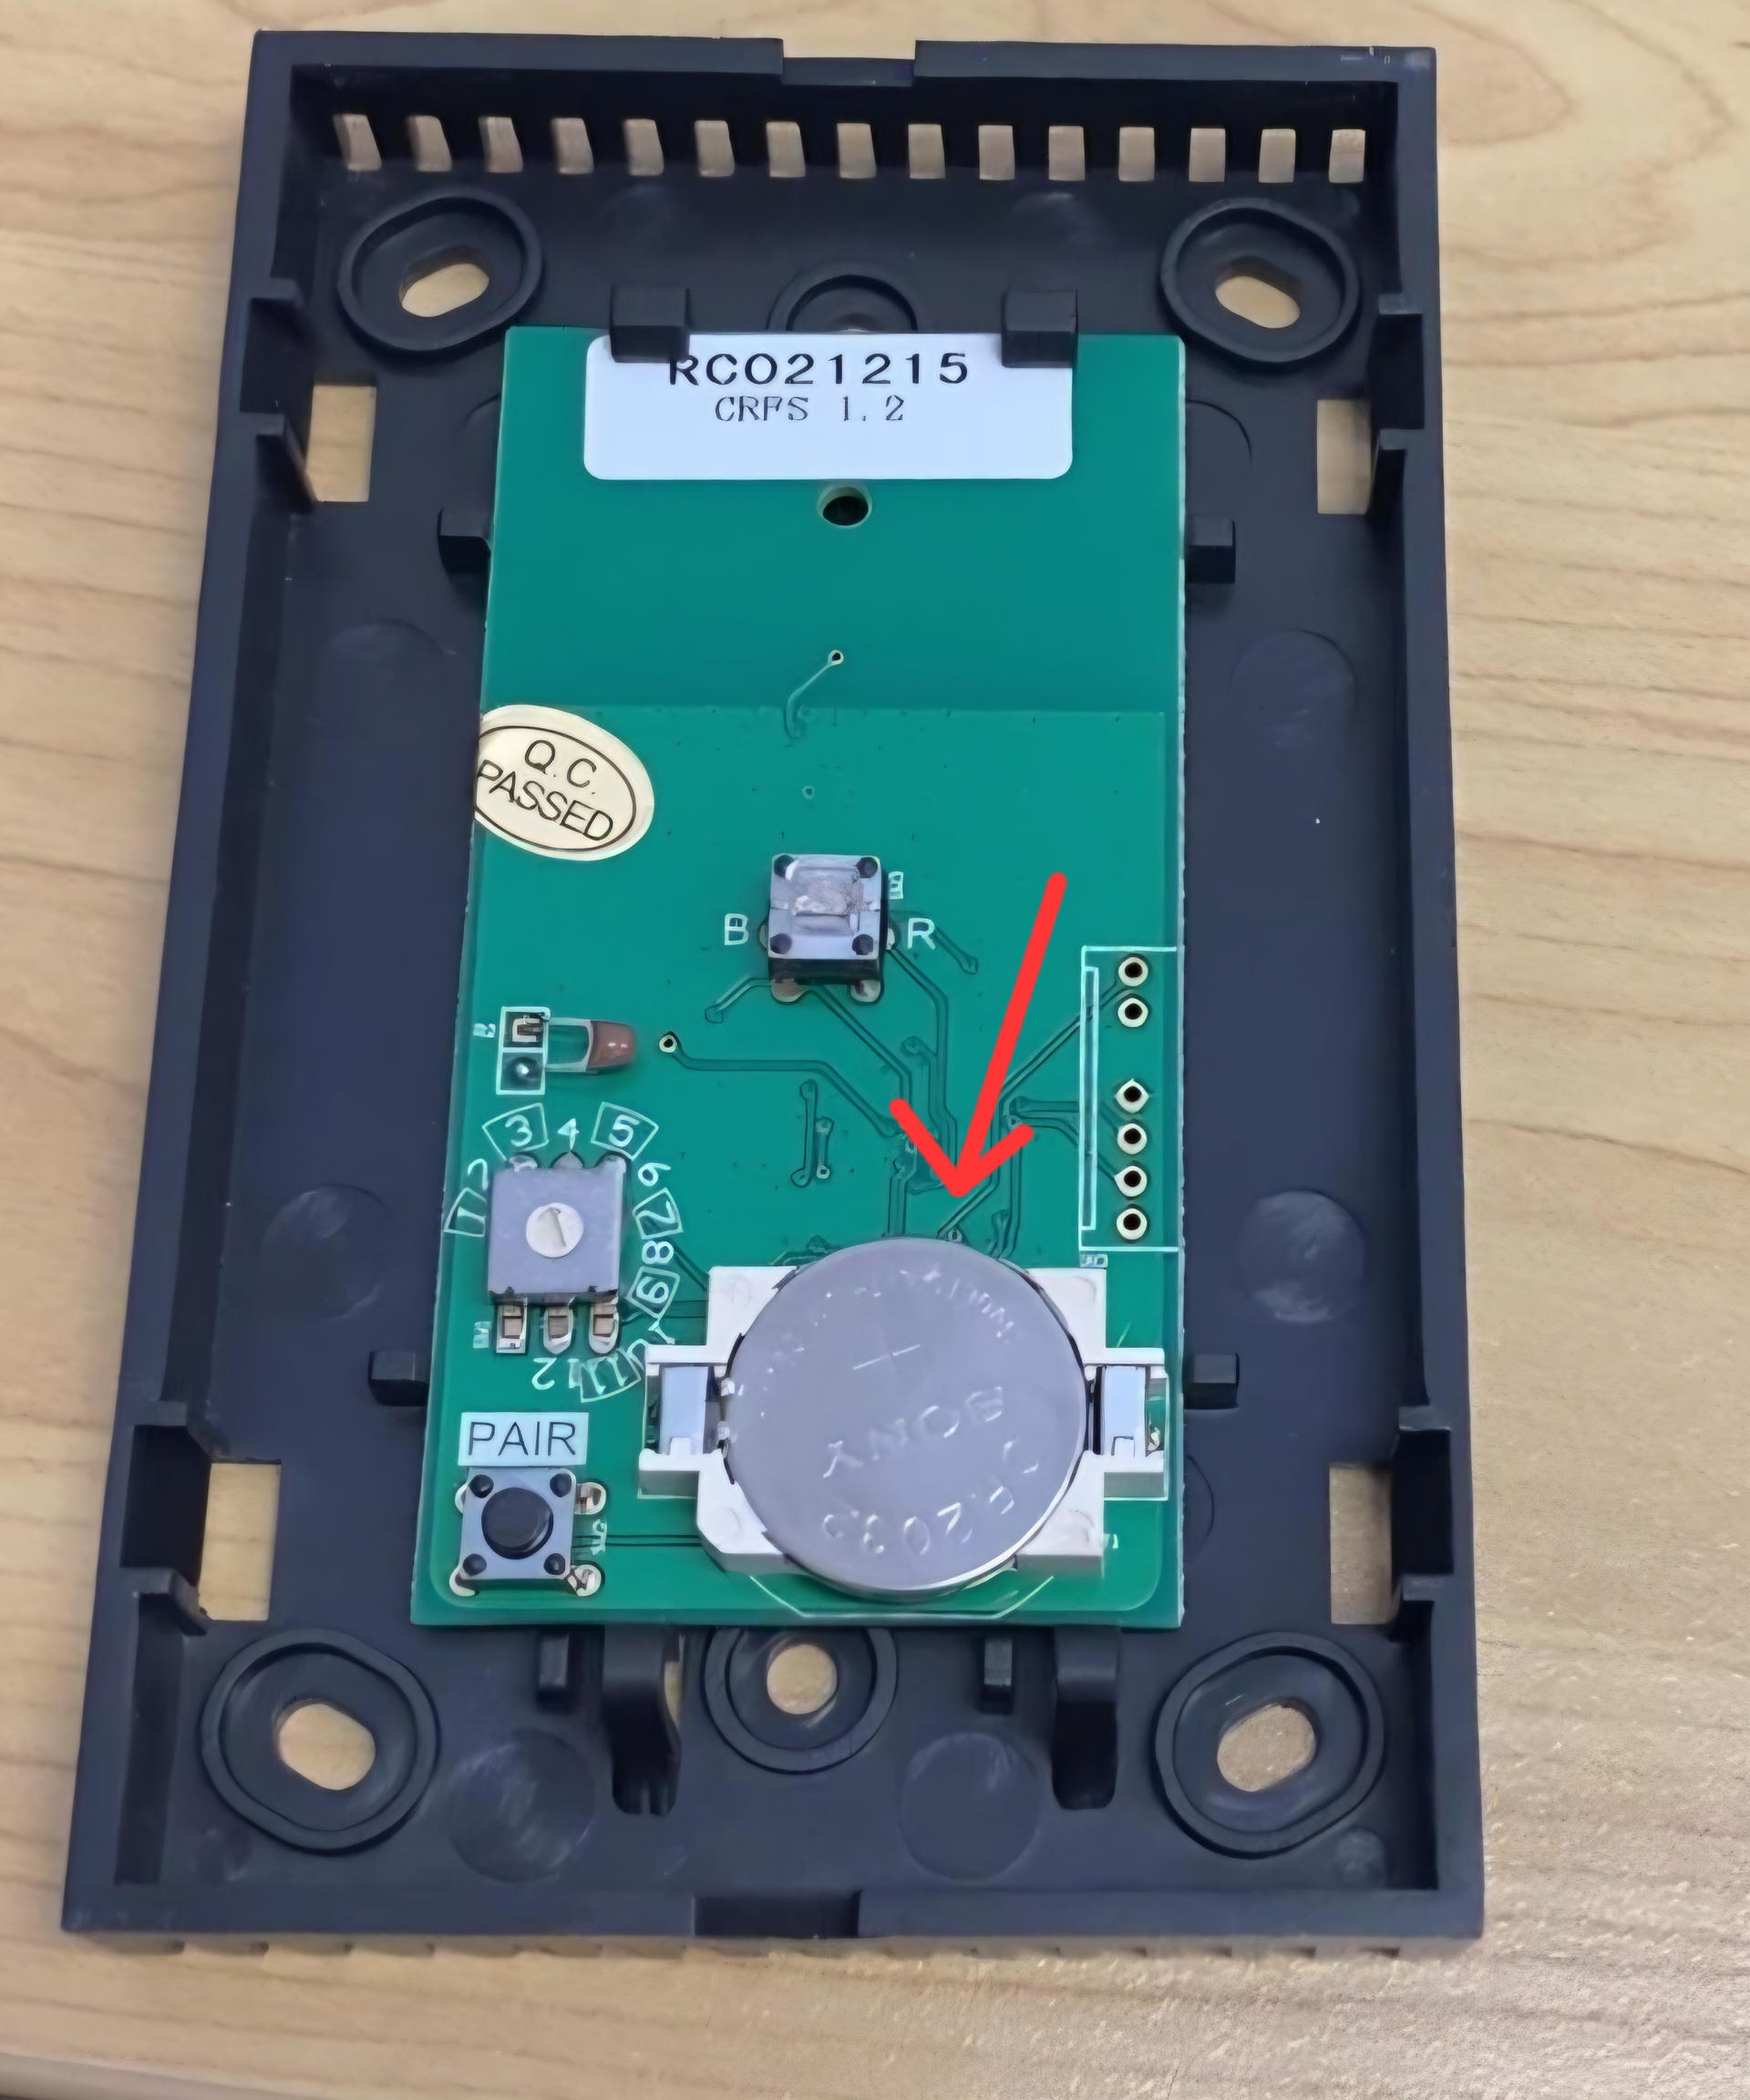
-
Remove the battery from the housing gently to prevent any damage to the battery holder.
-
Replace the battery with a new one. Make sure the battery is installed properly in the battery holder.
-
Once the battery is replaced, press the On/Off button and the sensor will start working again.
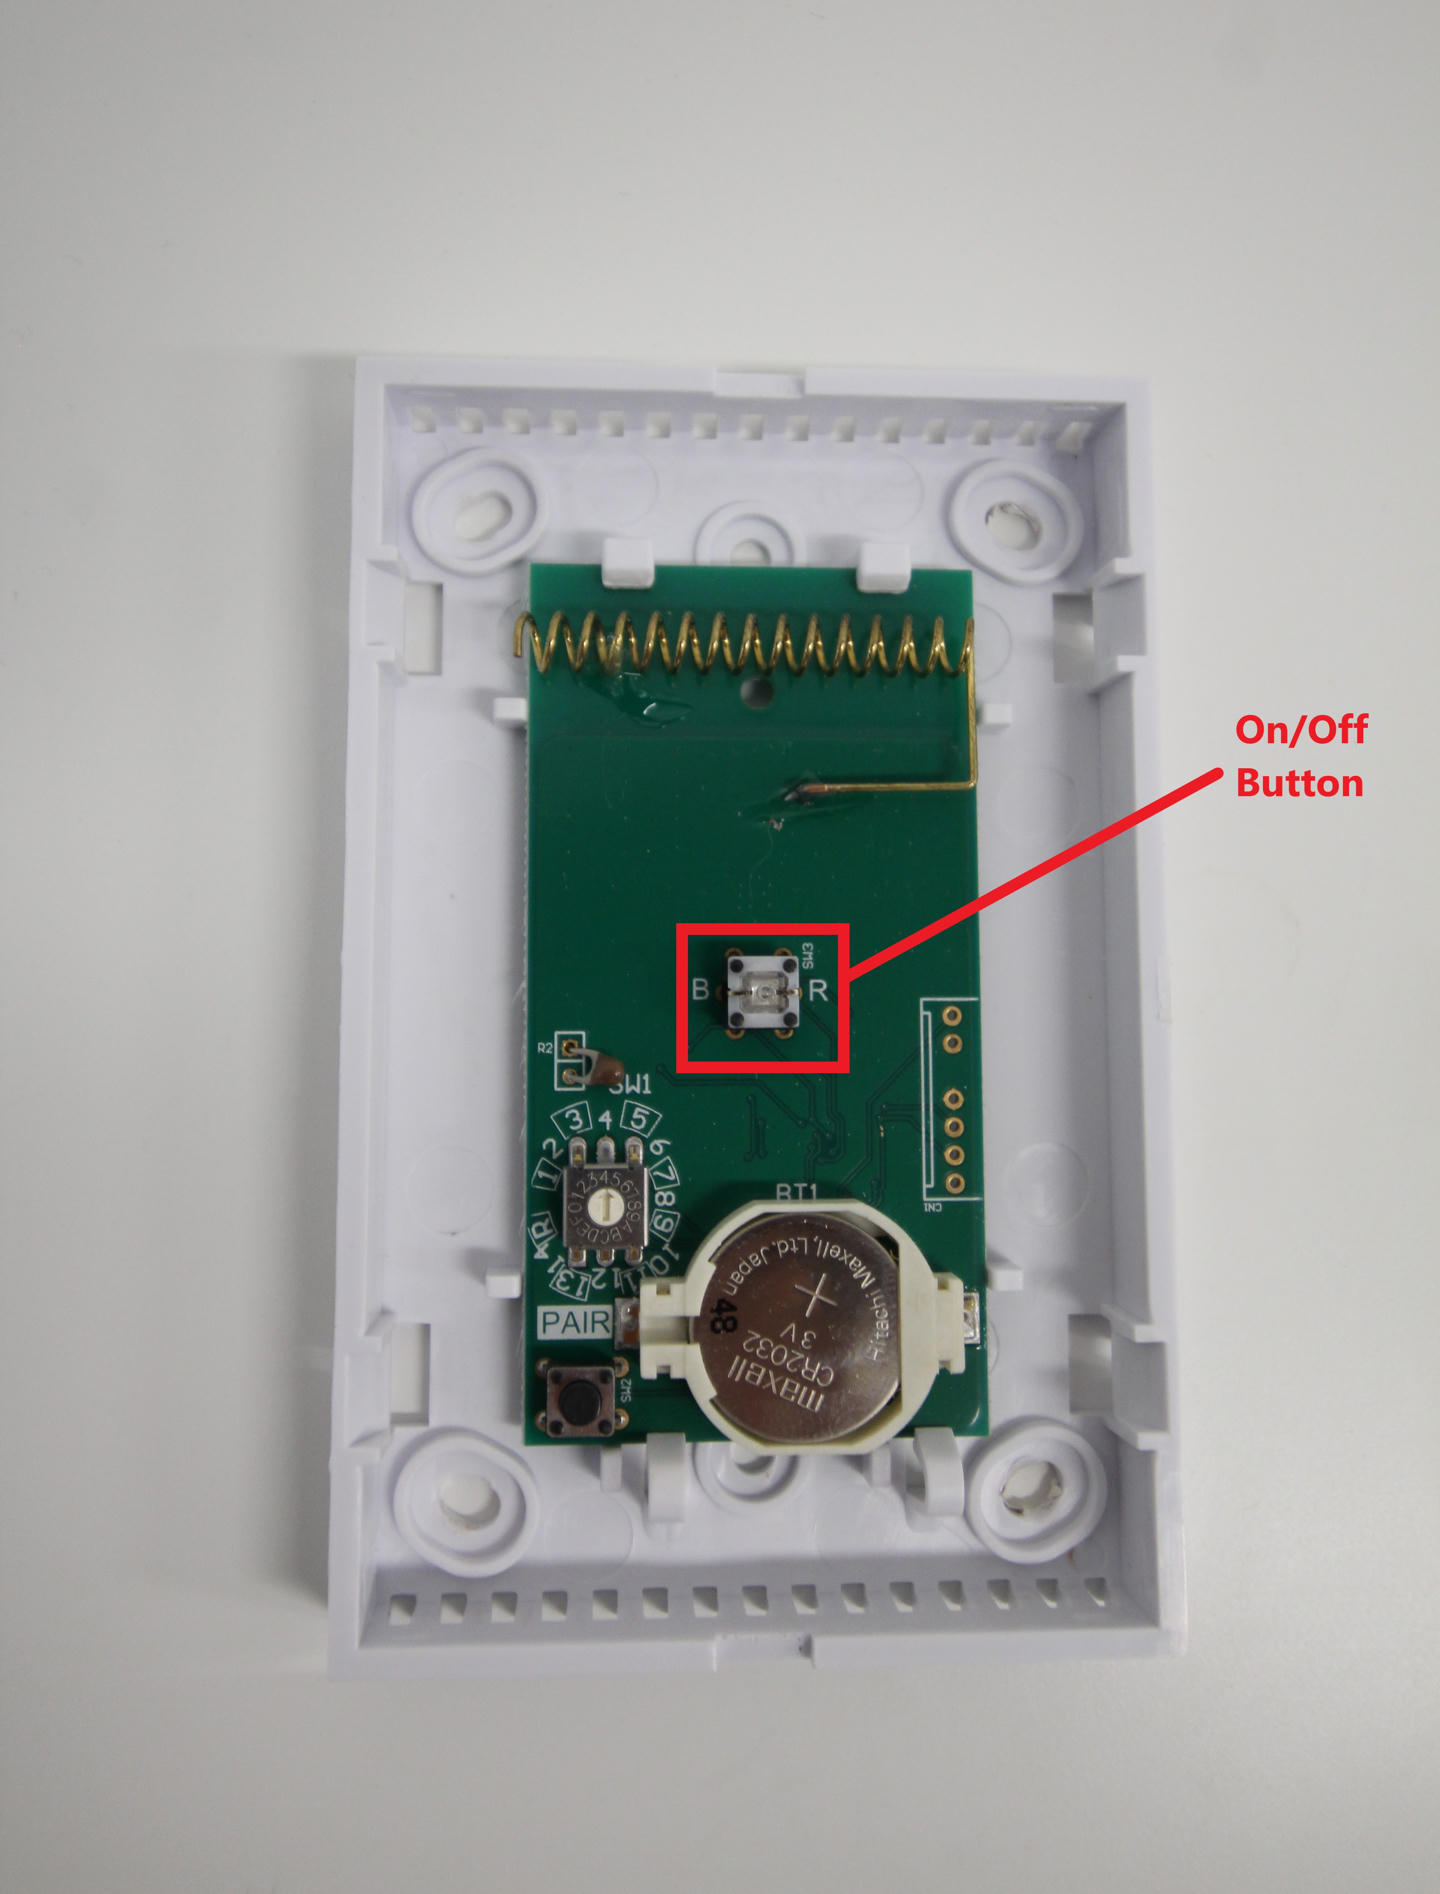
Older type sensor
For the old type of sensor, ensure that the two small metal pins are not pushed in under the battery after replacement. They must be positioned on top of the positive (+) side of the battery, making direct contact.
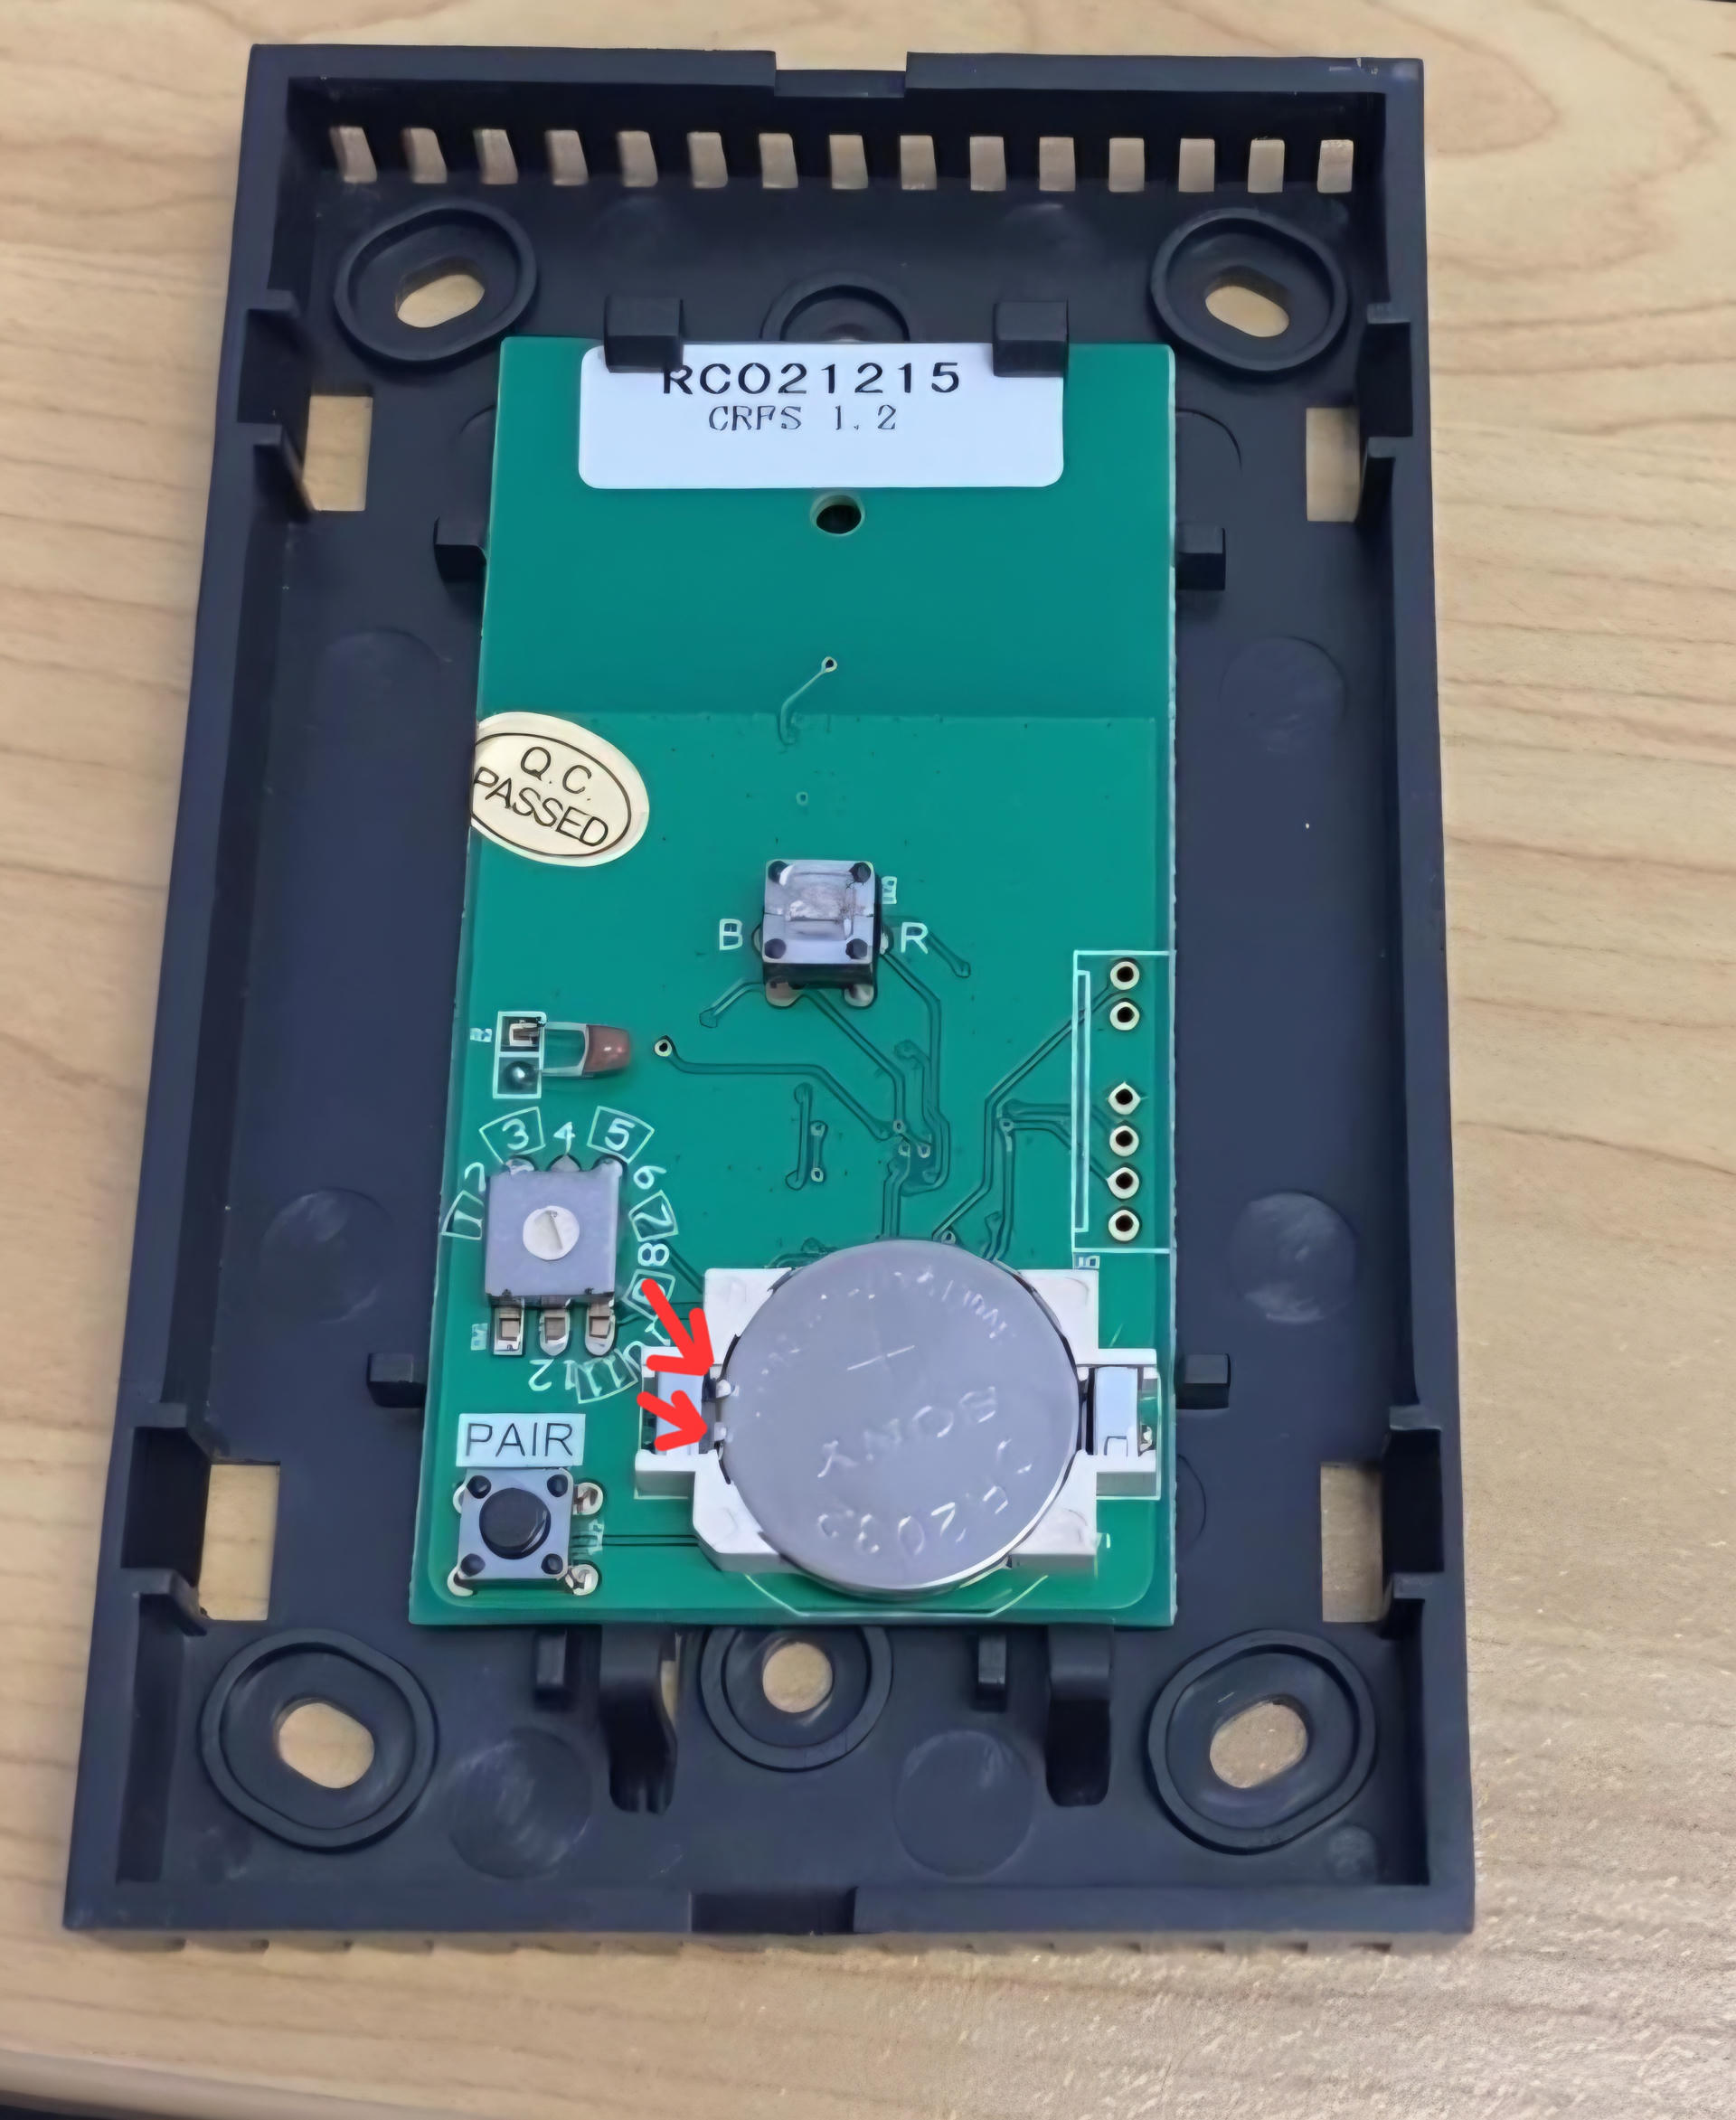
Review the following short video on how to insert the battery into the older type sensor without pushing in or damaging the pins.
If the pins are not properly touching the positive side of the battery, the sensor will not function. As a result, no lights will appear when pressing the centre or pair button, and the zone will not open in Climate mode or show an actual temperature reading.
If the On/Off light flashes
If the On/Off light starts flashing instead of going solid red or solid blue, the sensor needs to be paired again with the wall controller. Press and hold the pair button for a few seconds and then release it. The sensor should re-pair itself to the system.
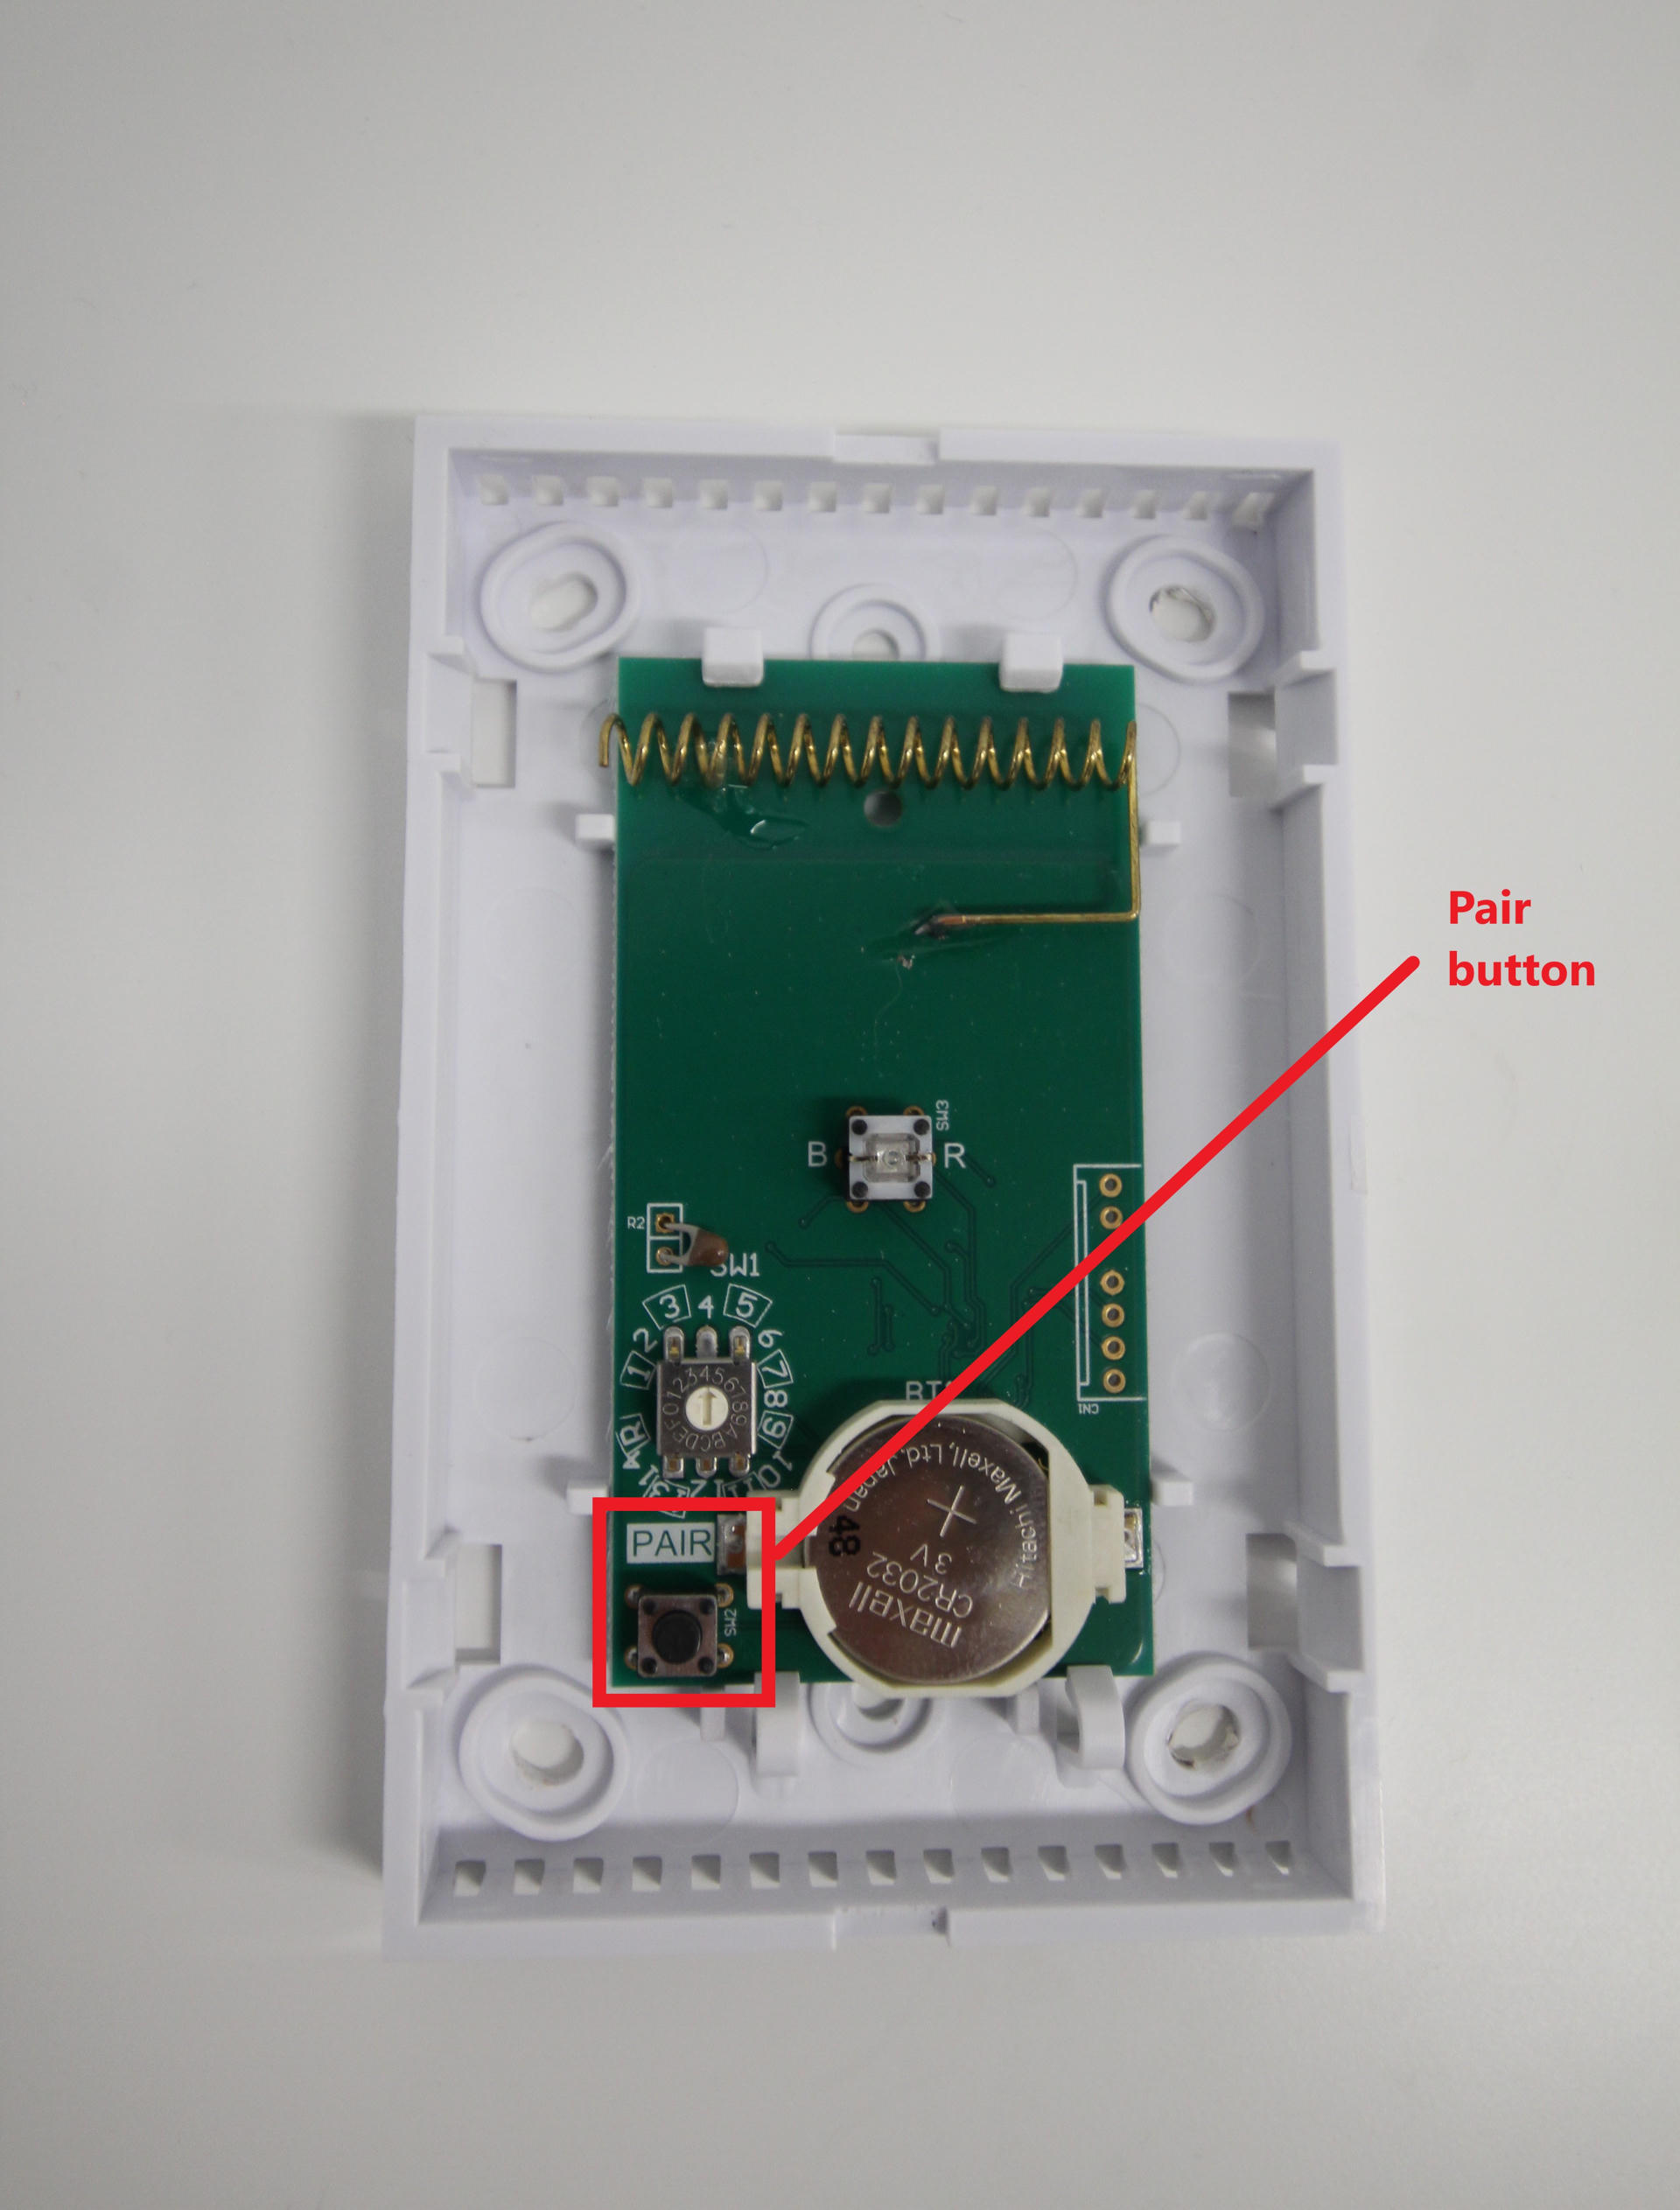
If the issue persists, follow the instructions to pair the wireless temperature sensor to the wall controller.