AC Unit Controlling Sensor
The iZone system provides multiple sensor options to control the AC unit, including:
- R/Air – Return air sensor
- Master – Allows the customer to select any sensor in the system to control the AC unit
- Zones – iZone automatically selects the most suitable sensor for the AC unit
- RF – Uses a single wireless iZone sensor to control an AC unit without zones
How to Select Control Sensor Options
| Control Sensor Option | Actual Temperature Measured From | Number of Sensors Used |
|---|---|---|
| Return Air Sensor | AC unit return air sensor | 0 |
| Zones | iZone wireless/wired temperature sensors per zone | 1 to 14 |
| Master | iZone wall controller | 0 |
| RF Sensor | Single iZone wireless/wired temperature sensor anywhere in the home | 1 |
The strategies for each sensor type
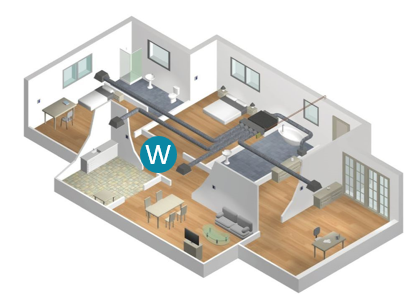
Return Air Sensor
This option uses the return air sensor built into the AC unit. When selected, the iZone system does not provide an Actual Temperature (ACT) signal to the AC unit.
Note that this option is not available on some brands that do not include a return air sensor. The return air sensor is the factory default on the iZone system.
Since it relies on a single sensing point, the return air sensor provides an approximate average temperature for all zones. As a result, the AC unit operates independently of individual zones and may cycle off before or after certain zones reach their set points.
When controlled via the return air sensor, the iZone system displays the AC unit set point in 1°C increments, and the AC unit’s control behavior remains consistent with that of its proprietary controller.
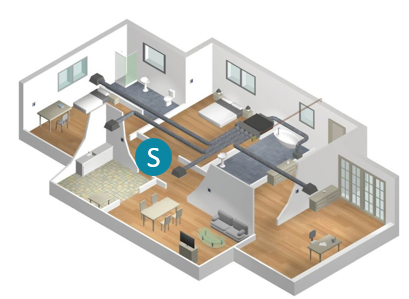
Master Sensor
When Master is selected, the iZone system displays an icon on both the touchscreen and the app, allowing the end user to manually choose which sensor will control the AC unit.
The user can switch the Master sensor at any time by changing the corresponding X on the screen to a ✔.
The AC unit is then controlled based on the set point and actual temperature readings from the selected Master sensor.
If the Master zone damper is accidentally closed, it will be held fully open, ensuring the AC unit continues to be controlled by the Master sensor.
While in Master Sensor mode, the AC unit’s temperature display updates in 0.5°C increments and maintains control within an approximate range of ±1°C, depending on the AC unit brand.
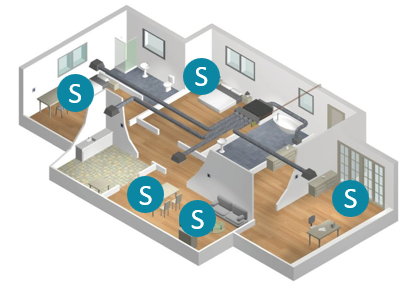
Zones
When Zones is selected, the iZone system scans all zone sensors set to “Climate” mode and selects the sensor that is furthest from its set point to control the AC unit.
As zones approach their set points, the controlling sensor may shift among them until the last zone reaches its set point. This scan occurs approximately every three minutes.
If there is a mix of “Open” and “Climate” zones, the AC unit will be controlled by the Climate zone sensor that is furthest from its set point, as described above.
However, if only “Open” zones remain and all Climate zones are closed, the AC unit will default to control via its return air sensor, as explained in the Return Air Sensor section.
If a Climate zone is activated, the iZone system automatically switches back to control based on Zones.
While in Zones mode, the AC unit temperature display updates in 0.5°C increments and controls within an approximate range of ±1°C, depending on the AC unit brand.
Controlling the AC unit from Zones typically delivers the most accurate temperature control and the lowest running costs among all sensor options.
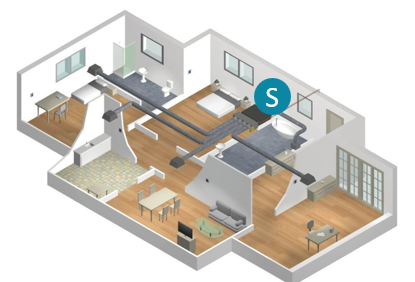
RF sensor
The RF option is designed for ducted systems without zones.
While it is possible to operate such systems using the unit’s return air (RA) sensor, using a wireless sensor (CRFS#) placed within the conditioned space can provide better temperature control and enable in-duct temperature display.
When setting up the CRFS#, set the zone dial to “R” or “F” on the selector switch.
This option is only available with wireless CRFS# sensors.
In RF mode, the AC unit displays temperature in 0.5°C increments and controls within an approximate range of ±1°C, depending on the AC unit brand. Additionally, the sensor’s button can be used to turn the AC system on or off.