Nimble Installation Guide
Step-by-step installation of the Nimble Zone Control Kit (C110K). Nimble is an open/close zone control system. It has no AC unit interface and no temperature sensors, so there is no controlling sensor to choose.
Check the system layout
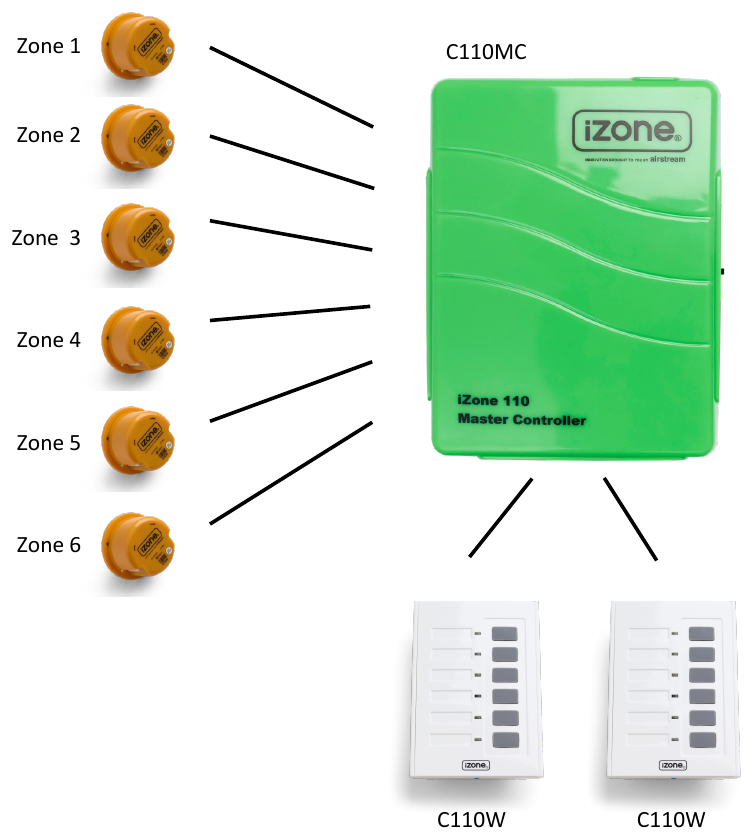
One Nimble system supports a maximum of 6 zones and 2 wall controllers. The zone damper motors and the Nimble Wall Controllers (C110WC) all connect to the Nimble Master Controller (C110MC).
Mount the master controller (C110MC)
Mount the C110MC near the AC unit. It can be installed on top of the indoor fan coil unit.
Connect the zone damper motors
- Connect a 24VAC zone damper actuator (CZDA) to each zone port using the RJ12 cables.
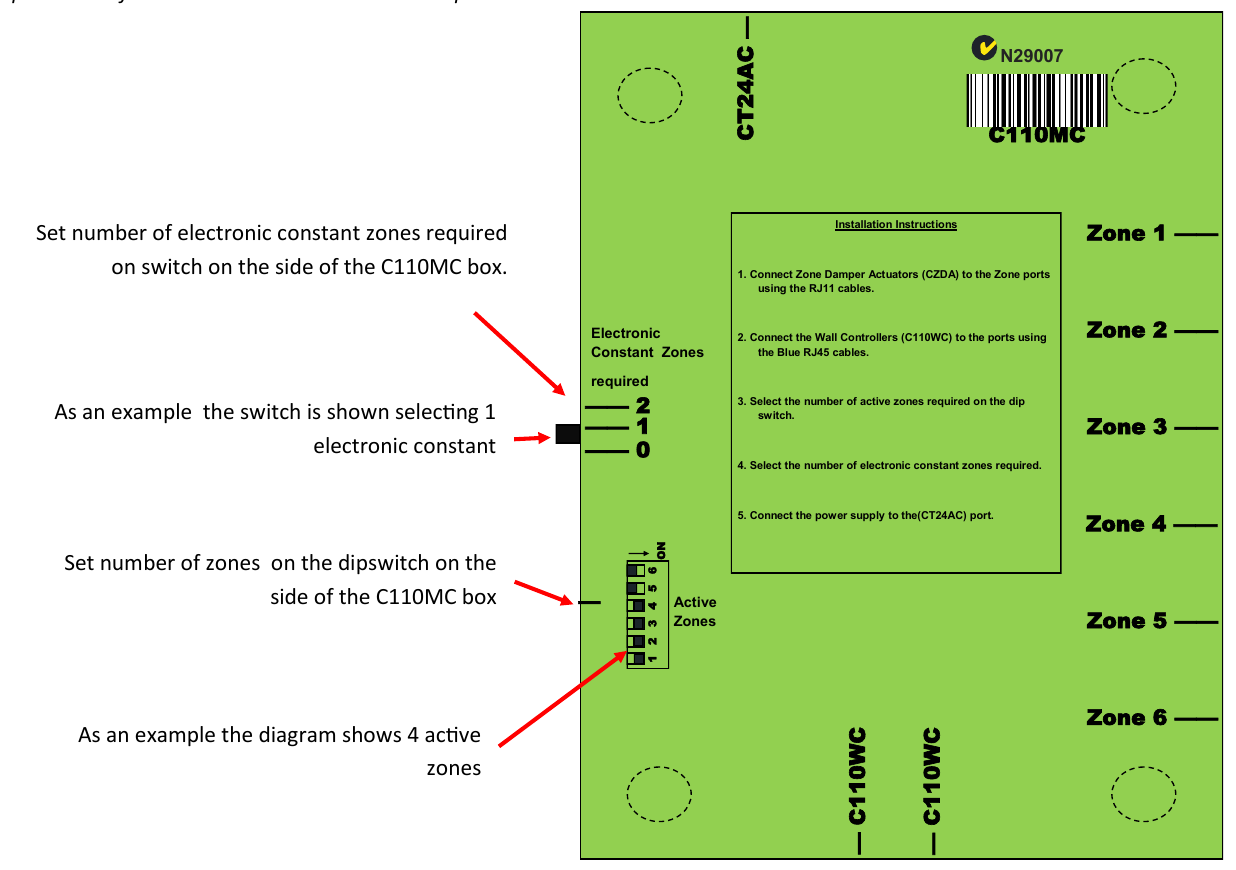
- Always install zones in consecutive ports starting at Zone 1. The back of the C110MC is marked with the zone port numbers.
Connect the wall controllers
- Connect each Nimble wall controller (C110WC) to a C110WC port on the C110MC using the blue RJ45 network cable (CFC12S).
- Do not run the blue network cables alongside 240V wiring.
- When running network cables down wall cavities or chasing them into walls, tape up and protect the RJ45 connector to avoid damaging it.
Set the active zones and electronic constants
On the side of the C110MC:
- Active zones: Set the 6 position dip switch. Switch down (ON) activates the zone, switch up deactivates it. The factory setting is all 6 zones active.
- Electronic constants: Set the switch to the number of electronic constant zones required (0, 1 or 2).
- 1: Zone 1 opens automatically if all the zones are closed.
- 2: Zones 1 and 2 open automatically if all the zones are closed.
- 0: Only use this if the system has at least one supply air outlet that is not zoned (fixed constant).
See Constant airflow for more detail.
Connect the power supply
Only connect the 24VAC power supply (CT24ACE) to the CT24AC port after all components have been connected. Plug it into a GPO. Do not hardwire the CT24ACE into the AC unit's power supply, as this may void the warranty.
Initialise the system
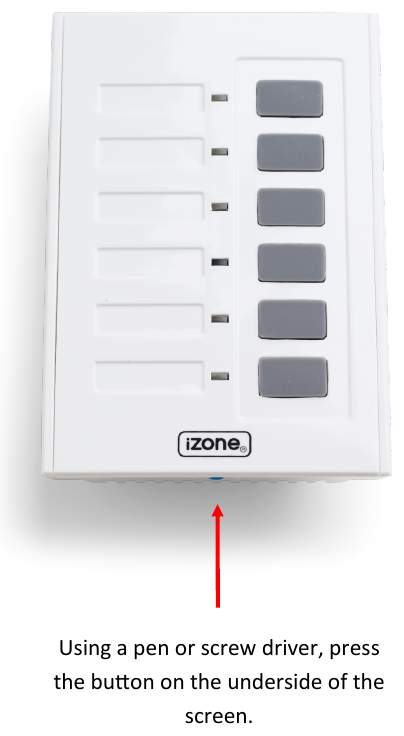
All new or modified systems must be initialised before use. Using a pen or small screwdriver, press the recessed button on the underside of any wall controller.
The time to initialise varies with the number of zone motors connected. The system also initialises when power is restored after a power failure.
Test and label the zones
- Set the AC unit fan speed to high.
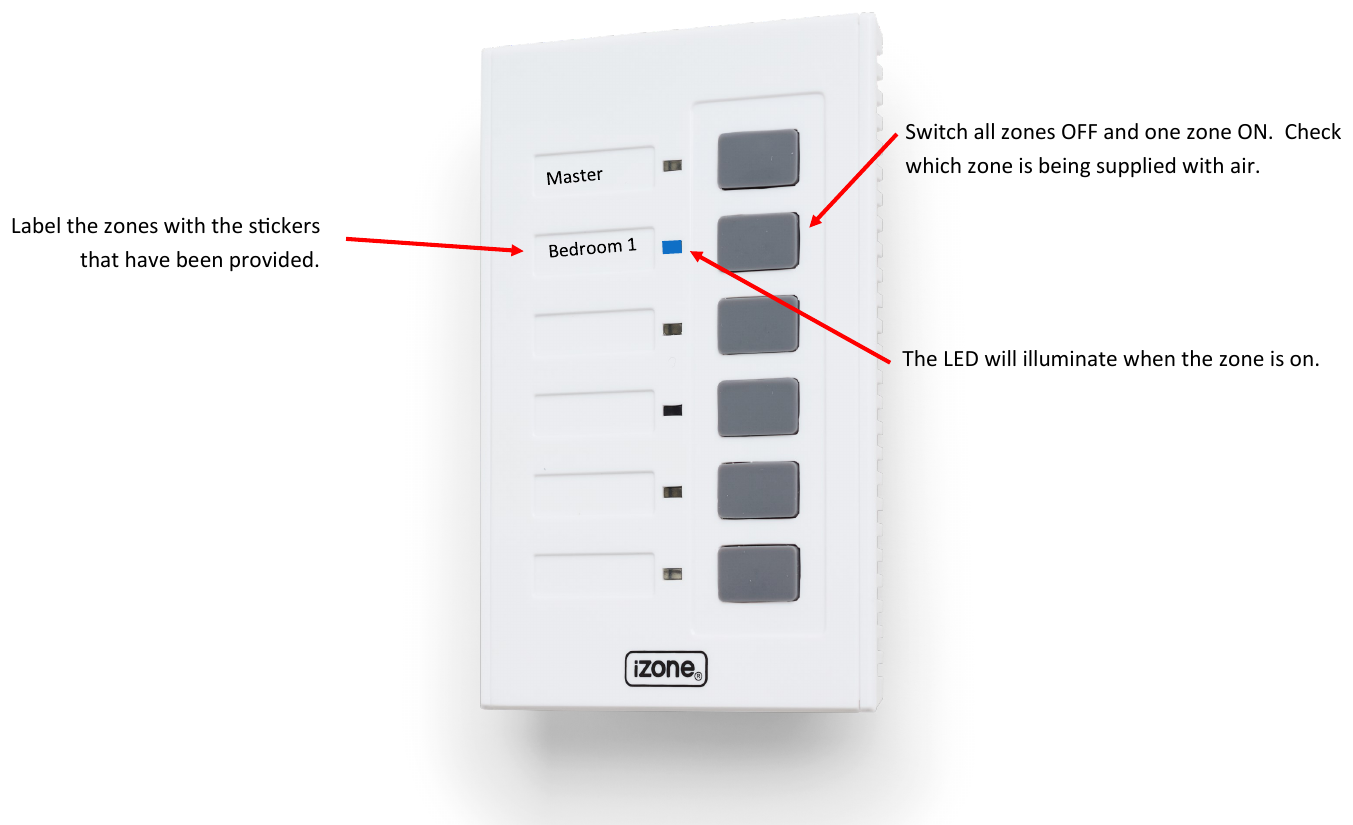
- Switch all the zones off, then switch one zone on. The LED lights up when a zone is on. Check which room is receiving air.
- Label the zone with the stickers provided, placing each sticker squarely in the recess. Peel off the protective coating.
- Repeat for each zone.
Need help?
- Nimble installation and user guide PDF
- Contact supportdesk@izone.com.au or call +61 8 6556 6415